
About a week ago we had our living room, staircase, dining room, and hallway painted. Everything was yellow, which wasn't terrible, but I wanted to make it a bit brighter & cleaner looking in here. I'll be sharing all of the rooms we made over soon!!

We've had a hutch in our dining room for a while (the one I repainted), but it was time for something new. I wanted something bigger, but more open. That's kind of scary, though, because all of my stuff might look too cluttered. Buttttt I decided to just go with it!! (Don't mind all the stuff on the table...it's from the living room which was also being redone!)


This project could take a while to do by yourself, so having a helper is awesome! Andy and Henry (the guy who restored our house and who we bought it from) were thankfully here to help me (AKA do it all) I designed. They built. Easy enough :)
Everything I used is from Home Depot, and only cost around $100.
Here is what you need:
Rubbermaid shelving (you can choose any size or color)
4 Rubbermaid twin tracks
Around 15 twin brackets with screws(this depends on how many/how long the shelves you choose are)
We first found our studs using a stud finder, but you can use wall anchors for your screws if you can't find the studs or if they are weirdly spaced. Ours were 16 inches apart, so we marked the wall with a pencil. Then we hung the tracks. They have varying lengths of tracks, I think mine are 48 inches. The average desk height is 29 inches, which seems low, so we started the tracks at 32 inches from the floor.

Once the tracks were in place, it was time to figure out where I wanted the shelves. The good thing about using this system is that you can move the shelves, but it is definitely harder to move them after they've been screwed into the brackets.
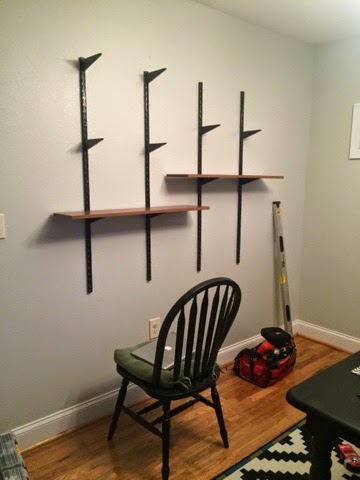


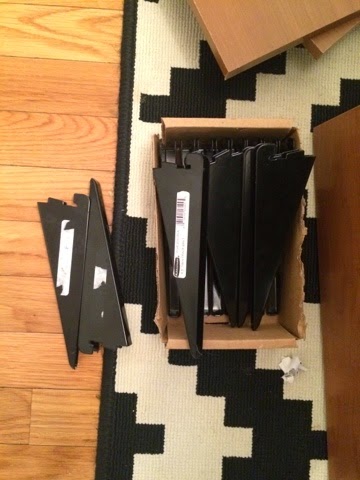
After peeling approximately 78365 price stickers off of everything, we screwed in the brackets to the shelves and hung them up!!

I wanted the shelves to have some overhang, and overlap each other, but you could make yours even or more spaced out. All of the shelves I chose are the same size (except the desk piece) the small ones are 8x36 and the desk (bottom piece) is 12x72.
Now for the best part...time to decorate!!


A lot of these things are really important and sentimental to me, so I'm glad I can look at them everyday *and show them off*
I'm still not completely finished with this room. I'm waiting on some curtains I ordered, I still need a chair so I can use the desk, and just some other little things that no one but me will probably ever notice!
Thanks for checking it out!!
XOXO


No comments:
Post a Comment